Help Guides:
View Quick Guide to updating your details on IIPortugal.org:
Click to view guide in
English
Clique para ver o guia em
Português
View help videos:
https://m.youtube.com/channel/UCdSVWXXxbKxS6ZLw9ZUMVyg
View email setup videos
Android/iPhone
https://youtube.com/shorts/miavc9kCQNQ?feature=shared
Outlook
https://youtu.be/6A1VeoyHQiU?feature=shared
Frequently Asked Questions
What is IIPT?
- IIPT is the new digital platform for the community in Portugal and Spain. By registering and maintaining contact details for yourself and your family, you can stay connected with the community 24 hours a day, as we move forward into the digital age.
Who should register? I was already registered in JIS - do I need to do anything?
- Yes - please login with the same login and reset your password. After this you will need to update your profile, and if you are the family administrator, the profile of your household members. A video to help you to reset your password is available here: https://youtu.be/fIwHon73tXY
- This platform replaces the JIS platform which is no longer functional.
Why should I register myself and my family?
- By registering yourself and your family you will benefit from:
- continuous access to jamati information, such as prayer times and addresses of jamat khanas
- Real-time updates to jamati and institutional events
- a simple way to inform jamati institutions of any changes in family circumstances such as address changes
- and a quick way sign-up to serve with the volunteers or institutions.
A video guide to help you is available here: https://www.youtube.com/watch?v=N9YRNHe2mfs
Where can I signup?
What happens if I have problems signing up or using IIPT?
How can I signup family members?
What about my data and privacy?
- Your data is housed within the ismaili instutions (ii) global application infrastructure which maintains the high levels of security (https, tls) and limits access to authorised institutional individuals.
Please fill out all mandatory questions - and as many other questions as you feel comfortable answering. Please bear in mind - you do not have to give any health, economic or education information you are not comfortable disclosing - but the more information you do provide - the more effective our institutions can be in designing programs and events, such as: seminars on people with a family history of diabetes, information on the best schools in your area or suggestions on trade associations that can help your career or business.
Can non-Ismailis family members register?
- Yes - this is for our whole community. You can simply select non-Ismaili during signup.
Does the application work in Portuguese, English and Spanish?
- IIPT is currently available in Portuguese and English. You can switch between these 2 languages by clicking on the flag at the top of the application.
When should I signup?
- The registration deadline is April 30th 2022
How do I add members of my household?
- You can add a family member by pressing the 'Add' button at the bottom of the family profile page. Once the profile is created - please take the printed registration form to your Jamati Mukhi/Kamadia for verification.
A video guide is available here: https://youtu.be/N9YRNHe2mfs?t=263
If you have any problems - please email iipthelp@cism.com.pt or send us a message via whatsapp on +351 927 176 030
Who can update details on minors under the age of 18 in my household?
- Only the designated 'Family Administrator' can edit details of minors in your household. If you have any problems with this please email iipthelp@cism.com.pt or send us a message via whatsapp on +351 927 176 030
How I enrol my children in Talim?
- Please watch the video available in the following URL
Institutional Applications FAQs
How do I grant access to individuals for an application that I own?
- Once you've logged in, from the home page go to Institutional Applications.
- Note if you don't have this option, either your account is invalid or you are not an
application
owner.
- From the next page, choose Committee Tools.
- All appointees have access to this tool, so if you don't most likely you are not an
application owner.

-
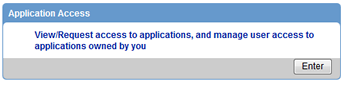
On the next screen, open Application Access
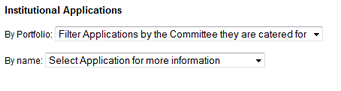
- If you know the application you are after, choose it from By name. If you're
unsure, filter
down the list using the By Portfolio drop down.
- Once you select the application you are after, you will see a breakdown of it, along with a list of
existing
permitted users.
- If you see a Request access to this application button instead of a list of
users, you
are not the owner.
The owner will be listed under Admin Contact so please contact them to get
access
fixed.
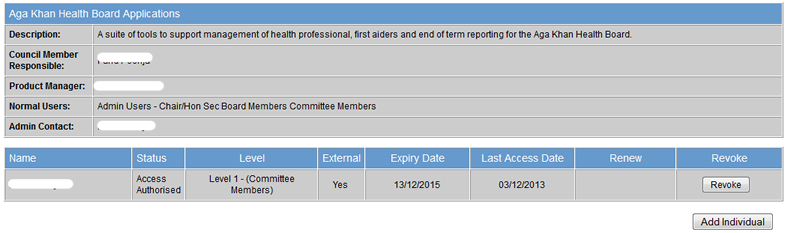
- Click on Add Individual on the bottom right.
- You will be presented with a directory lookup. From here you can choose the committee that the
individual is on,
most likely yours, then tick the box next to their name, add a justification, and click Add
Users.
- It is recommended you use this, for nothing more than it'll be
much quicker. You may think it's easier to enter the name manually rather than spend time
looking it up,
but
it'll cost you in the long run and the process cannot be chased.
- If you are unable to find the individual, or they are not in a committee, you can click the
Can't find
who you're after? Add Manually button in the bottom left and provide details to match
them to CDS.
- Note that the individual must be in our database. Anyone not in our database will be
rejected.
- It is recommended you use the directory lookup if they are in the directory, for nothing
more than it'll
be much quicker. You may think it's easier to enter the name manually rather than spend time
looking it
up, but it'll cost you in the long run and the process cannot be chased.
- That's it. It'll then be with VP for approval. On approval, you will be notified, and the individual
will also
be notified, assuming they have a valid email address in our system.
- The individual will also be sent a message via the internal messaging system in this website, which
contains a
data protection notice. They must read this and accept it before they will get access to the tool.
Failure to do
so will result in their access not being granted.
- If you find the individual does not have access even though you received the email from VP,
you must
make sure they have checked their messages in the website. These are clearly visible via a
flashing
orange Messages button on the top right of their screen after they log in.
Even if they
do not have a valid email on our system they will receive this message.

How do I request access to an application I do not own?
- You need to contact the application owner who can grant this for you.
- Follow steps 1-5 in the How do I grant access to individuals for an application
that I own? section
and you will see the Admin Contact listed, who is the person you should contact for
access.
- You will also see a button allowing you to request access just below, which you can use to send them
an email
automatically.
How do I reject access to an application I own?
How do I raise a data request?
- Please note that permission to raise requests is limited to Chairs and above. If you are not
permitted you will
see an error when you try to access the Data Request tool in step 3.
- The Data Request Tool is for one-off, adhoc requests. Repeat requests should be discussed with the
data
controllers directly to come up with a long term solution. The data controllers will raise this with
you if they
find a request repeating a number of times.
- Once you've logged in, from the home page go to Institutional Applications.
- Note if you don't have this option, either your account is invalid or you are not an
application
owner.
- From the next page, choose Committee Tools.
- All appointees have access to this tool, so if you don't most likely you are not an
application owner.
-
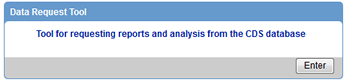
On the next screen, open Data Request Tool.
- If you do not have the necessary appointed level to raise requests you will now see an error
message
telling you this. You will need to ask someone more senior to raise the request for you.
-
You will now see an empty table, and a New Request button in the top left. Click
this button.
- If you see entries in the table then you have raised requests before.
-
You will be presented with an NC mandate for requesting data. Please read through this as compliance
with this
statement is mandatory. Anyone who is found to be in contempt of this mandate will
be barred
from accessing this data in future.
-
At the bottom you will see two buttons, one for Email Mailshot and one for
Request for
Data Extract. Click this second button.

- You will then see a set of mandatory questions, that must be answered in order to have your request
approved.
- Please note that the NC data controllers may still disagree with your request, at which
point they will
discuss the changes with you and either modify the request themselves or reject it back to
you to
resubmit.
- Finally, select how long you require the data, and press Submit.
- Requests can only be active for 3 months max. Any data still required after 3 months will
require a new
data request.
- You will be taken back to the screen you saw in step 4, but with one entry in it in
Draft
state. You may review and amend it at this point until you are ready to submit it.

- Once you are happy with it, click the submit button on the right of the request. It will then
progress through
various data controller approvals before being completed or rejected.
- During this time the data controllers may contact you for more details or justifications.
Please ensure
you comply with any conversations during this time to avoid your request being rejected.

- On completion, you will receive email notification tht the data request has been processed. To
retrieve any
exports, you must return to this same screen, where you will see a documents icon on the right of
the data
request entry (highlighted in red below). From here you can access your files.

How do I make a request for a one-off mailshot to jamati members on the CDS database?
- Follow steps in the How do I raise a data request? section, but choose
Email
Mailshot in step 6.
- The rest of the options are similar but self explanatory, the only different
being the questions asked in step 7.
- The page in step 7 will also advise you to send a copy of the mailshot you are sending, if more
complex than
plain text, to an email address.
|
|